This blog post is going to be a really short tutorial for those who want to start using PlatformIO IDE with any Arduino board.
Table of contents
Your usual Arduino use case
So, normally with an Arduino board you are going to use Arduino IDE, which is fine in most cases. But after some time you might wonder if there is any tool which would not be so cumbersome to use, especially when your microcontroller code gets quite lengthy. The answer is yes, there is, and it is called PlatformIO.
About PlatformIO
PlatformIO is a development environment which allows you to program lots of different microcontroller boards. You can use it with Arduino, ESP, STM and many more MCU boards. The software is free, so anyone can use it. Also, it is based on Visual Studio Code text editor, which itself is easy to use and has advanced features if you will ever need it.
One of the best features (in my opinion) that the Visual Code has is word autocompletion/suggestion. You start typing function name and it will suggest for you. It is very convenient if you have lots of different function names and don’t remember them all.
Simple PlatformIO example with Arduino Nano
Used software and hardware in this example
- Arduino Nano equivalent board (Affiliate Aliexpress)
- USB to mini-USB cable (usually comes with Arduino or can be bought from Aliexpress)
- A PC with PlatformIO installed
Download and install PlatformIO
For this step I will suggest doing the steps that are written in the official page. After doing that, you will have ready to use IDE and can continue with the example shown further.
Create a new Arduino project in PlatformIO
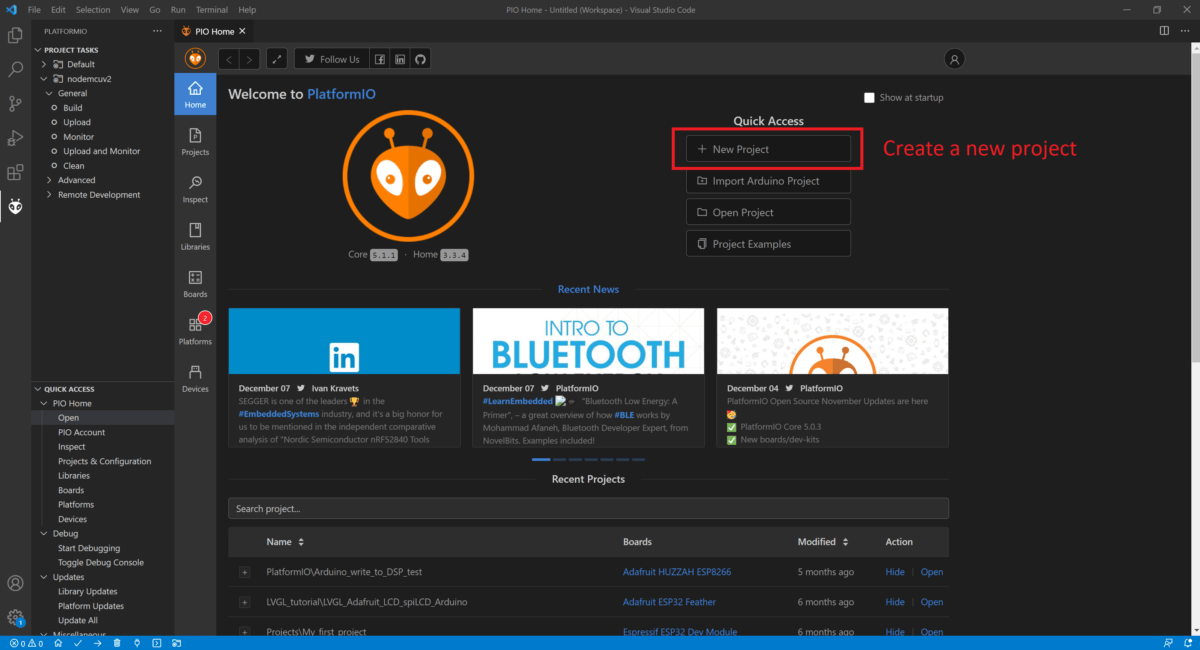
Firstly, open Visual Studio Code. When it opens, press new project. If you see just empty screen with no new project button, then press PlatformIO icon ![]() and Home – Open button.
and Home – Open button.

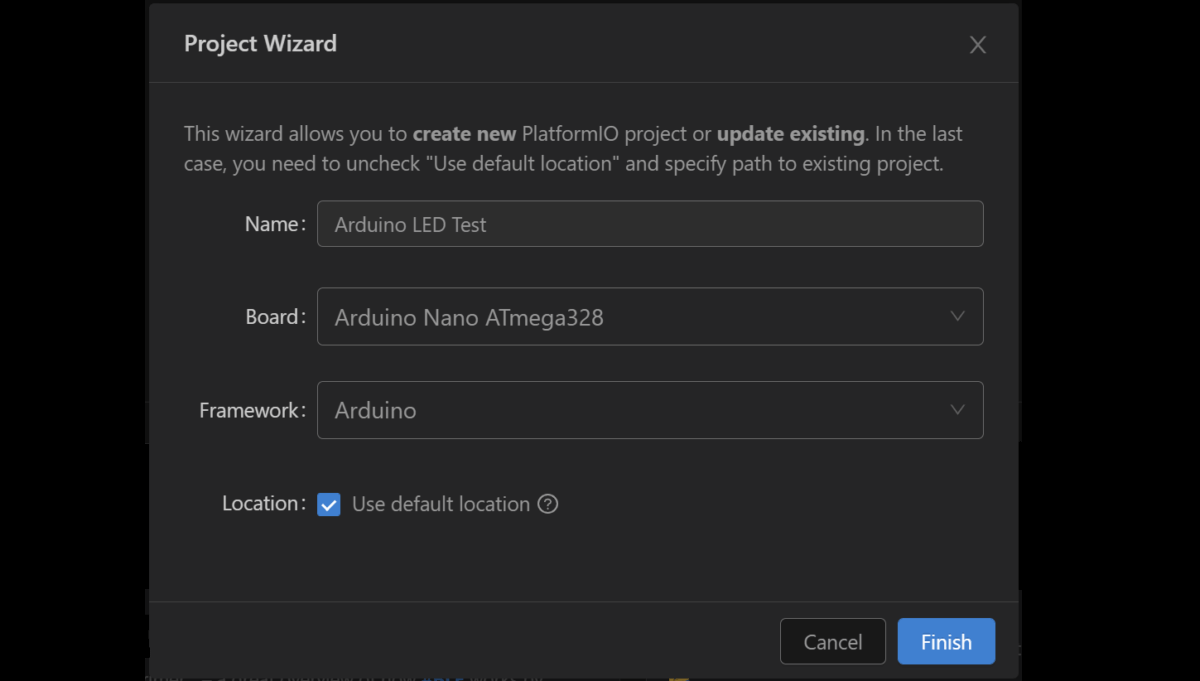
Then a Project Window will open. There you will need to select the board which you are using, create project’s name and select where you want to save the project on your computer. Some boards might have several selections, for e.g. mine had option to use board with “new bootloader”. If you don’t know which one to use, select the new one and if it won’t work, the try the old one.

Click Finish and the Project Wizard will create your project structure.
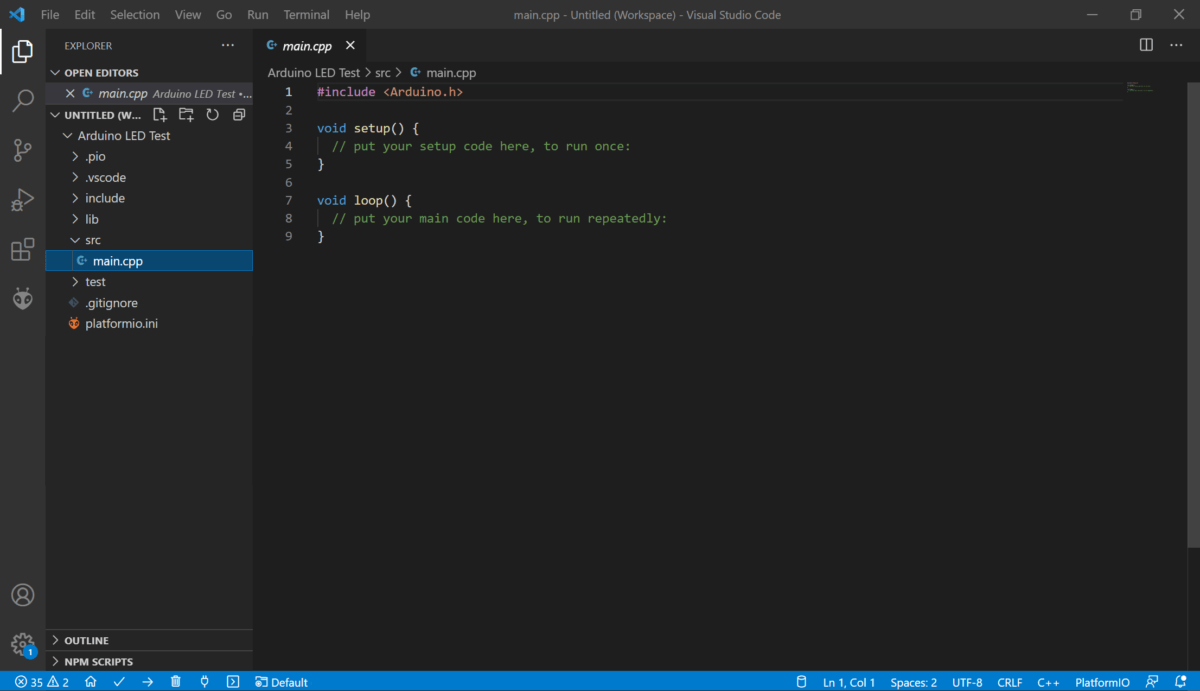
PlatformIO file structure
The PlatformIO project consists of 3 main parts:
- lib folder – here you will put all project specific libraries (for e.g., LCD library which you will use in you project), not used in this example
- src folder – put your source files here (like main.cpp – primary file used in this example)
- platformio.ini file – project configuration file – not used in this example
Write some code!
So, when you have your first empty project created, let’s write some code. And what the best “hello world” example is in Arduino world? Yes, a blinking LED 😀
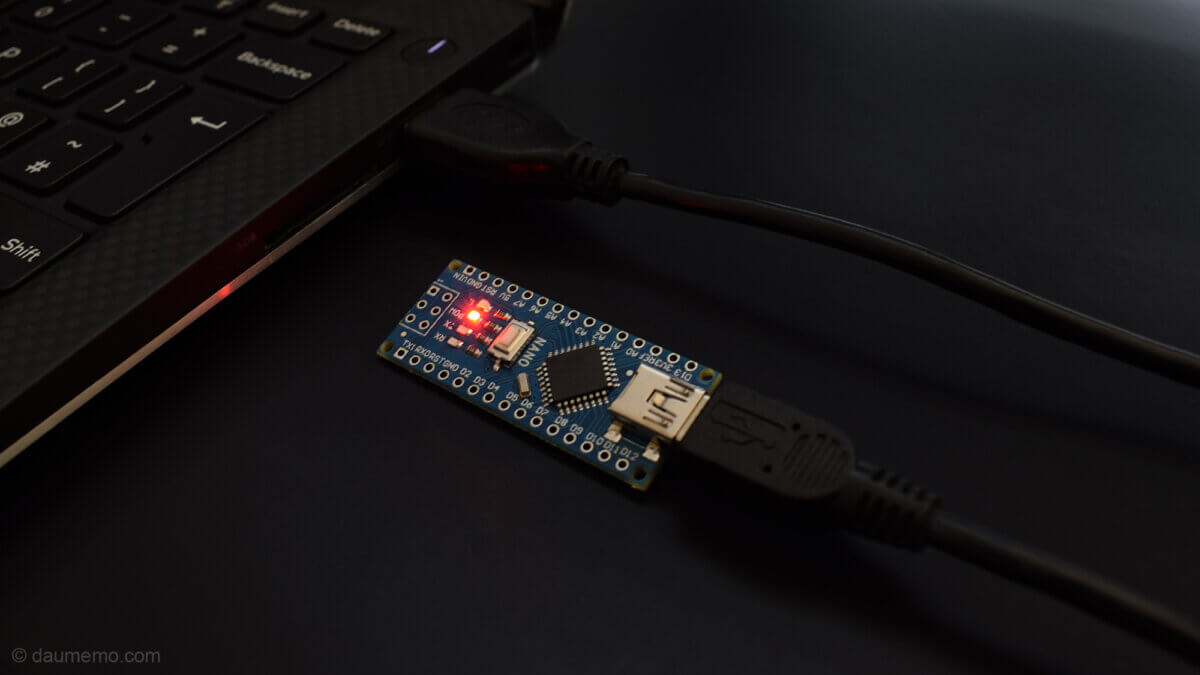
Arduino Nano board has already an LED soldered into the board. So, we will use it in this code snippet.
First of all, you can connect your Arduino board to the PC. Windows usually automatically finds and installs all needed drivers for you. And if you have only your Arduino connected to the PC, PlatformIO will automatically find the port where your board is connected to, so you really don’t have to do anything more.
Next, open main.cpp file for editing which is in src folder:

There you will find two main functions already written. They are setup() and loop() which you should be familiar with, if you have ever programmed some Arduino boards.
If you are not familiar with those two functions, then for short, setup() is used to run your code once when the MCU starts and loop() runs your code indefinitely until you cut off power from the board.
So, the simple LED blinker code could look like this:
#include <Arduino.h>

void setup() {
  // put your setup code here, to run once:
  pinMode(13, OUTPUT); // Set Pin 13 as OUTPUT
}

void loop() {
  // put your main code here, to run repeatedly:
  digitalWrite(13, 1); // turn ON LED
  delay(1000); // wait for 1 second
  digitalWrite(13, 0); // turn OFF LED
  delay(1000); // wait for 1 second
}
Note, than onboard LED is connected to Pin 13, so we use it in this code example.
Click build button ![]() and when the code successfully builds press upload button
and when the code successfully builds press upload button ![]() . The code should be uploaded to your board.
. The code should be uploaded to your board.
The result – blinking LED on your Arduino board.

The INI file
It is also a good idea to know about one particular thing – platformio.ini file. This is your project’s configuration file where, by default, you will have platform, board and framework definitions:

It is good idea to know about this file, as it allows to define some additional settings. For example, you could define which serial port to use, if you have several of them:
upload_port = COM8By adding such line you will tell PlatformIO to use only ‘COM8’ port to upload the code. Also, this can be an IP address, if you are using OTA firmware updates.
More about this configuration file you can read in the official documentation: PlatformIO INI File.
Summary
So, as you should be able to see, to start using PlatformIO with Arduino boards is quite simple. In the long run you will find that PlatformIO is more convenient to use that ArduinoIDE.


